How to Save Twitch Streams: VODs, Highlights, and Archives

Has been streaming on Twitch since 2020 and grew her channel from an empty chat to a steady audience. Writes step-by-step guides for new streamers: getting started, picking a category and keeping your first viewers.
13 November 2026
Leer en españolЧитать на русском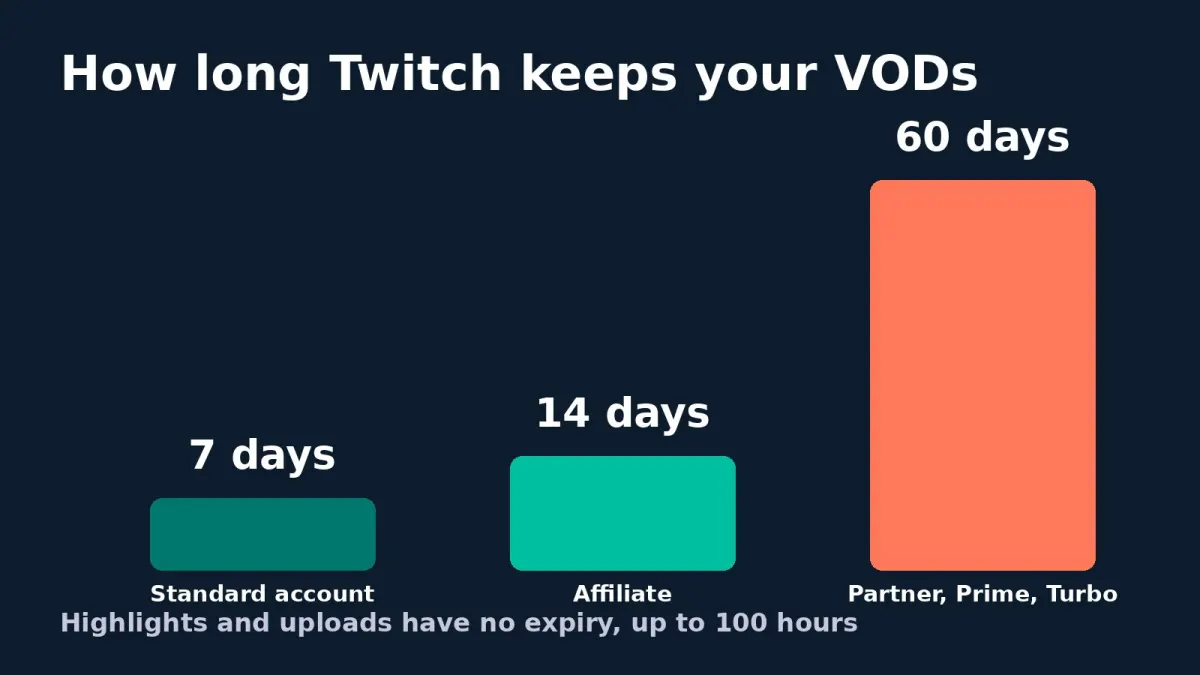
In short: Twitch saves your stream recordings (VODs) only if Store Past Broadcasts is turned on before you go live, and it deletes them after 7, 14 or 60 days. To keep a stream for good, download it, export it to YouTube, or record a copy in OBS ahead of time. Below: where each option lives and how they differ.
A common story: you have a great stream, a couple of weeks later you want to cut a video from it, and the recording is gone. Even Twitch Support cannot bring it back. It is better to set up your archive before you need it.
Turn on past broadcast storage first
Twitch does not save every channel's streams by default, and one setting decides it:
- Open the Creator Dashboard on twitch.tv.
- Go to Settings, then Stream.
- Turn on Store Past Broadcasts.
The setting only applies to future streams: anything you broadcast while it was off is not saved. It can only be changed on the web, not in the mobile app, so if you stream from your phone, switch it on from a computer first.
How long Twitch keeps VODs
The period depends on your channel's status and counts from the end of the stream:
| Account type | VOD retention |
|---|---|
| Standard channel | 7 days |
| Affiliate | 14 days |
| Partner, plus Prime and Turbo users | 60 days |
If you stream in 2K or in vertical format, the higher-quality version (2K or vertical) expires after 7 days, and the regular 1080p or horizontal one stays for the rest of your period. Not an Affiliate yet? See our guide on how to get Twitch Affiliate.

Highlights: keep your best moments on Twitch
A highlight is a cut from a VOD that you can keep on your profile as a showcase. Highlights do not expire on a timer, but they share a limit: 100 hours across all highlights and uploads together, including unpublished ones.
To make a highlight:
- In the Creator Dashboard, open Content, then Video Producer.
- Find the recording, click the three dots next to it and choose to create a highlight.
- Mark the start and end of the segment, add a title and publish.
You can only make a highlight from a VOD that still exists, so do not wait. If you add stream markers during the broadcast, it is easier to find the moments worth cutting later.
Clips are a separate thing: short moments created by viewers or by you. They sit outside both the retention periods and the highlight limit, which makes them handy for saving one moment.
Download a stream to your computer
Downloading is the most reliable way to end up with a file that is yours:
- Content, then Video Producer.
- Click the three dots next to the VOD and choose Download.
Twitch hands over videos one at a time, there is no bulk download, and for long streams the download may take a while to start. If audio was muted in some place because of music, it stays muted in the downloaded file as well.
Export to YouTube: an archive without downloading
Twitch can send VODs to YouTube directly:
- In Twitch settings open Connections and link your YouTube account.
- In Video Producer click the three dots next to a VOD and choose Export.
- Fill in the title and description and confirm.
To export videos longer than 15 minutes, verify your YouTube account. There you also get storage without the 100-hour cap and can polish thumbnails and chapters. For how YouTube can help you grow alongside Twitch, see our piece on multistreaming to Twitch and YouTube.
Recording in OBS: a copy that does not depend on Twitch
The safest insurance is recording the stream to your own disk. You get a file that never expires and is often better quality than what viewers see:
- In OBS open File, then Settings, then Output.
- Switch Output Mode to Advanced and open the Recording tab.
- Pick a folder and a format. MKV is the safest: if OBS or your PC crashes, the file is not lost entirely. You can convert it to MP4 later via File, Remux Recordings.
- Press Start Recording together with the stream.
Watch your disk space: an hour of high-quality video takes several gigabytes. We covered encoder settings in how to set up OBS for Twitch, and the bitrate calculator helps you pick a bitrate for your channel.
Which option to choose
| Option | How long it lasts | Best for |
|---|---|---|
| VOD on Twitch | 7, 14 or 60 days | rewatching a stream and cutting clips |
| Highlight | no expiry, up to 100 hours | best moments on your profile |
| Downloaded file | as long as you keep it | editing, a personal archive |
| YouTube export | no expiry | a public archive and rewatching |
| OBS recording | as long as you keep it | the original in best quality |
A sensible minimum for a small channel: storage always on, your best streams exported to YouTube right after the broadcast, and an OBS recording running as a backup.

Why keep streams when your audience is still small
Old recordings work for your channel: they become Shorts and videos, they show what worked on air, and a newcomer can judge a channel by its highlights. Once streams have a live audience, such reels hold new visitors better. To see how a stream looks with viewers, booststream.net has a free test: 10 viewers for 1 hour. Run it, then turn the recording into a highlight and see which moments landed best.