How to Set Up OBS for Twitch: Step-by-Step Settings Guide

Has been streaming on Twitch since 2020 and grew her channel from an empty chat to a steady audience. Writes step-by-step guides for new streamers: getting started, picking a category and keeping your first viewers.
5 November 2026
Leer en españolЧитать на русском
Short answer: To set up OBS for Twitch, connect your Twitch account or stream key, switch Output Mode to Advanced and choose a hardware encoder (NVENC, AMF or QuickSync H.264), CBR and a 2-second keyframe interval. Pick the bitrate by resolution - 6000 kbps for 1080p60, 4500 kbps for 1080p30 or 720p60, 3000 kbps for 720p30 - with upload about 30% higher, then set up audio and scenes and run a test stream.
OBS Studio is the free program most new Twitch streamers go live with, and plenty of experienced ones too. You can install it and hit "Start Streaming" in five minutes, but with default settings the picture often breaks into blocks, audio drifts out of sync and viewers get buffering. This guide walks through the setup step by step: connecting Twitch, bitrate, resolution, audio, scenes and a test before your first real stream.
Before you start
- Download OBS from the official site, obsproject.com. Skip repacks and "lite" builds from file-sharing sites: they can carry malware or outdated encoders.
- Check your upload speed. Streaming depends on upload, not download. Test it in the evening, at the time you usually go live.
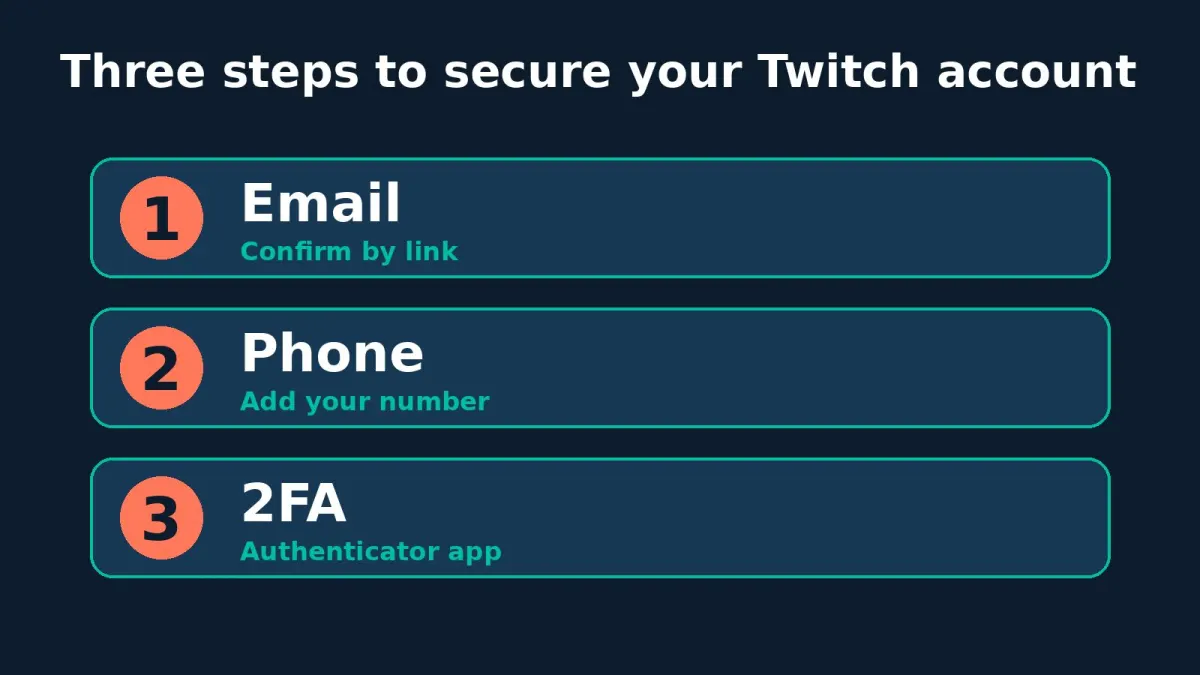
- Turn on two-factor authentication on Twitch. Twitch may ask for it before showing your stream key, and it is required for monetization, so it is easier to do it now.
If you'd rather not set everything by hand, OBS has an Auto-Configuration Wizard under the Tools menu. It runs a test and suggests settings. That is fine for a first try, but the wizard sometimes picks a bitrate that is too high or the wrong encoder, so compare its result with the steps below.
Step 1. Connect Twitch to OBS
Open File - Settings - Stream and choose Twitch as the service. You have two options.
Connect Account. OBS opens a Twitch login window and fills in the key for you after you sign in. You also get chat and stream info docks inside OBS, so you can change your title and category without leaving the program.
Use a stream key. Where to find your Twitch stream key: Creator Dashboard - Settings - Stream - Primary Stream Key. Copy it and paste it into the Stream Key field in OBS. Leave the server on Auto.
Your stream key works like a password for your broadcast: anyone who has it can stream to your channel. Never show it on screen or paste it into chats. If it leaks, click Reset on the same Twitch page and paste the new key into OBS.
Step 2. Output settings: encoder and bitrate
Go to the Output tab and switch Output Mode to Advanced so every setting you need is visible.
Encoder. With an NVIDIA graphics card pick NVENC H.264, with AMD pick AMF H.264, and with Intel integrated graphics pick QuickSync H.264. A hardware encoder barely touches your CPU, so your game keeps its frame rate. Software x264 makes sense only when the GPU is weak and the CPU has cores to spare. If you use x264, start with the veryfast preset.
Rate Control should be CBR, constant bitrate. Twitch recommends it because variable bitrate dips in quiet scenes and spikes in action, and those spikes cause buffering for viewers.
Keyframe Interval should be 2 seconds. Twitch requires it, and other values can cause stuttering or playback errors.
Bitrate depends on resolution and frame rate. Twitch's recommendations for H.264:
| Resolution and frame rate | Video bitrate |
|---|---|
| 1080p at 60 fps | 6000 kbps |
| 1080p at 30 fps | 4500 kbps |
| 720p at 60 fps | 4500 kbps |
| 720p at 30 fps | 3000 kbps |
Your upload should be about 30% higher than the bitrate. For 6000 kbps that means roughly 8 Mbps of stable upload, plus whatever else in the house is uploading at the same time. If you don't have that headroom, drop one row: a steady 720p is nicer to watch than a 1080p stream that keeps freezing. To work out the numbers for your connection and game, use our OBS bitrate calculator. It suggests resolution, frame rate and bitrate for Twitch, YouTube and Kick.

Recent OBS versions also offer Enhanced Broadcasting for Twitch on NVIDIA cards. OBS then sends several quality versions itself, so viewers on slow connections don't depend on Twitch transcoding. If your card supports it, it is worth trying, but test it on a private stream first.
Step 3. Resolution and frame rate
On the Video tab:
- Base (Canvas) Resolution - your monitor resolution, for example 1920x1080 or 2560x1440.
- Output (Scaled) Resolution - what viewers see. 1920x1080 if your bitrate and hardware allow it, otherwise 1280x720.
- Downscale Filter - Lanczos when base and output resolutions differ. It gives the sharpest picture when scaling down.
- Common FPS Values - 60 for shooters, racing and fighting games, 30 for talk streams, strategy games and art. If your PC can't hold 60 fps in the game and in OBS at the same time, choose 30: a smooth 30 beats a choppy 60.
Step 4. Audio and microphone
On the Audio tab set the sample rate to 48 kHz. The audio bitrate for Twitch lives under Output - Audio: 96 to 160 kbps is recommended, and there is no point going above 160.
Add your mic as an Audio Input Capture source. Click the gear next to it in the Audio Mixer, open Filters and add them in this order:
- Noise Suppression removes PC fan hum and street noise.
- Noise Gate mutes the mic while you are silent, so viewers don't hear your keyboard and breathing.
- Compressor evens out volume, so shouting in a clutch moment doesn't blast ears and quiet lines stay audible.
Watch the meter in the mixer: normal speech should reach the yellow zone without hitting red. Before going live, check how your mic sounds with our mic test for streamers, and if left and right seem mixed up, run the headphone test.

Step 5. Scenes and sources
A scene in OBS is the set of things viewers see. Three scenes cover most needs: "Starting soon", the main game scene and "Be right back". You switch between them with one click.
The main sources:
- Game Capture for fullscreen games, the lightest option for your system.
- Window Capture for a browser, apps and windowed games.
- Display Capture for the whole monitor. Handy, but it can show things you didn't mean to, like notifications or your stream key.
- Video Capture Device for a webcam. Before your first stream, check light and framing with our webcam test.
- Browser for alerts, timers and widgets. Our stream timer for OBS, for example, goes in as a Browser source.
Twitch chat can also go on screen through a Browser source if you want viewers to see the conversation. Keep the camera and chat away from important parts of the game such as the minimap, health bar or score.
Step 6. Run a test stream
Before your first real stream, do a private test. The simple way: add ?bandwidthtest=true to the end of your stream key in OBS. Twitch accepts the stream but doesn't show it to viewers or notify followers. Stream for 10-15 minutes, play what you plan to stream and open the Stats window in OBS.
Two lines matter:
- Dropped frames (network) - if this number grows, your connection can't carry the bitrate. Lower it or switch from Wi-Fi to a cable.
- Frames missed due to rendering lag or skipped due to encoding lag - your PC is struggling. Switch to a hardware encoder, lower the output resolution or go to 30 fps.
Remember to remove ?bandwidthtest=true from the key afterwards, or nobody will see your real stream either.
Common problems
Black screen instead of the game. Run OBS as administrator. On laptops with two GPUs, OBS and the game must run on the same one, which you set in Windows graphics settings.
Audio out of sync with video. Usually a webcam or mic adds delay. In Advanced Audio Properties, give that source a sync offset in milliseconds and tune it during a test.
"Encoding overloaded". Your PC can't compress video fast enough. A hardware encoder, a faster preset, a lower resolution or 30 fps fixes it.
The stream lags only for viewers. Check network dropped frames and your upload headroom. Channels without Affiliate status may not get quality options for every viewer, so people on slow connections have to watch your source bitrate. In that case 720p at 4500 kbps often works better than 1080p. We covered what Affiliate takes in How to Get Twitch Affiliate.
Summary
A stable Twitch stream in OBS comes down to a handful of settings: CBR, a 2-second keyframe interval, a bitrate that matches your resolution with upload headroom to spare, a hardware encoder, 48 kHz audio and filters on your mic. Scenes and overlays can be polished as you go. Always run a test and check the stats before your first stream.
Once the tech is ready, what's left is viewers. Our guide on getting your first Twitch viewers covers how to bring in the first ones. And if you want to see how your stream feels when someone is already watching, try the free BoostStream test: 10 viewers for one hour at booststream.net. Paid Twitch viewers start at $0.02 for 5 viewers for 1 hour.